
Landscaping
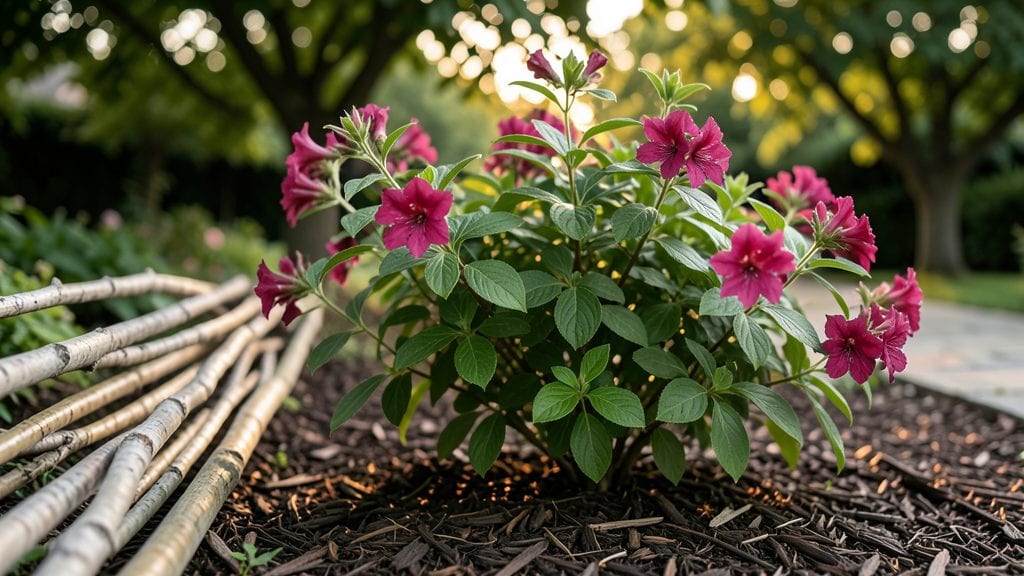
My garden borders used to look like a straight line drawn with a ruler—until I discovered tree branch edging. ✨ This natural border transforms any yard into a woodland retreat while requiring almost no maintenance.
The best part? You’re recycling fallen branches instead of buying plastic or metal edging that’ll rust in five years.
I started with branches from my own yard—oak, maple, and pine—cut to uniform lengths around 2 feet tall. The process takes less than an afternoon, and the results last for years as long as you bury the bottom 6 inches to prevent rot.
You can arrange them in a classic straight line or weave them into organic curves for a wild, natural look that blends seamlessly with plants and mulch.
Once installed, these borders become a living part of your garden. They support climbing plants like clematis, hide weeds naturally, and even add texture to photos of your space. The rustic charm works equally well for cottage gardens, modern landscapes, or woodland-style designs—no extra cost, just creativity.
For extra durability, treat the branches with a natural wood preservative if you’re in a wet climate. The key is choosing branches that are already dry and free of disease. With this method, your garden edges will look intentional, not imposed—just like nature intended.
📚 In This Guide
- What you need
- Instructions
- Tips and common mistakes
- Wrapping up and next steps
What you need
- ● Tree branches: 50–100+ (depending on garden size), 1–3 inches in diameter, and 3–5 feet long. Choose dry, straight branches free of knots or rot.
- ● Post-hole digger or shovel for securing stakes.
- ● Galvanized or stainless steel spikes (12–18 inches long) to anchor branches into the ground.
- ● Hammer or mallet for driving spikes.
- ○ Measuring tape and stakes (optional but helpful for marking layout).
- ● Garden twine or zip ties to bundle branches temporarily during installation.
- ● Pruning shears for trimming branches to desired lengths.
- ● Gloves (heavy-duty for protection while handling branches and spikes).
- ● Wood preservative or outdoor sealant to extend branch lifespan (apply if using fresh-cut branches).
- ● Landscape fabric to suppress weeds beneath the edging.
- ● Decorative elements: Solar-powered lights, moss, or small plants to enhance the rustic look.
- ● Level for ensuring an even border (especially for larger gardens).
- ● Knee pads for comfort during installation.
How to create a rustic tree branch garden border
Here's the simple method I use to craft a natural, long-lasting border that blends seamlessly with any landscape.
🪴 Step 1: Gather and Prepare Your Materials
Collect 4-6 feet of straight, sturdy branches—about 2-3 inches in diameter—from fallen trees or pruned limbs. I prefer branches with slight curves for a natural look, but straight ones work too. Clean them thoroughly by scraping off any loose bark or debris with a wire brush. This ensures a smooth finish and prevents rot down the line.
Cut the branches to your desired length using a handsaw or pruning shears. For a standard garden border, aim for 18-24 inches per section. If you find branches with natural forks or interesting shapes, save those for decorative accents along the border. Soak the branches in a bucket of water for 1-2 hours to prevent them from cracking as they dry.
✂️ Step 2: Lay Out and Secure the Base
Mark your border path with garden stakes and string to create a clean, straight line. Dig small holes—about 6 inches deep and 4 inches wide—along the marked path, spacing them 12-18 inches apart. The depth ensures stability, while the width allows room for the branch to sit securely without wobbling.
Place one branch into each hole at a slight angle—about 30 degrees—so the top curves outward slightly. This creates a natural, inviting curve that guides the eye through your garden. Use a mallet to tap the branch gently into the hole until it sits firmly. For extra stability, especially in windy areas, add a small amount of concrete or gravel to the base of each hole before inserting the branch.
🌱 Step 3: Connect and Reinforce the Border
Once all branches are in place, weave smaller branches or vines through the gaps to create a cohesive look. I like to use flexible willow branches or grapevines because they bend easily and add texture. Secure them by tying them to the main branches with soft twine or natural jute string. This step is optional but adds a finished, polished touch to your border.
To reinforce the structure, especially if you're using this border in a high-traffic area, drive a wooden stake or metal rod into the ground behind each branch. Bend the top of the stake slightly and attach it to the branch with twine. This hidden support keeps everything in place without detracting from the natural aesthetic. Water the base of each branch lightly to help it settle into the soil.
☀️ Step 4: Finish and Maintain for Longevity
Apply a natural wood preservative or beeswax to the branches to protect them from moisture, insects, and decay. I use a mix of 1 part beeswax to 2 parts turpentine, melted together, and brush it on evenly. This step isn’t just about looks—it extends the life of your border for 5-10 years or more, depending on the wood type. Let the preservative dry completely before walking near the border.
Check your border periodically for loose branches or signs of wear. If a branch starts to sag or crack, replace it immediately to maintain the integrity of the design. Over time, you can refresh the look by adding new branches or vines, especially if some of the original ones weather or degrade. This border isn’t just functional—it’s a living piece of your garden that evolves with your space.
Tips & tricks for perfect tree branch garden edging
Creating a natural garden border that lasts takes more than just sticking branches in the ground—it's all about the details that make it truly sturdy and beautiful. Here's what I've learned from years of building these borders that stand the test of time.
Branch Selection Matters: Don't just grab any branches—look for ones with a slight taper and minimal knots. The ideal branches should be 2-3 inches in diameter and have a natural curve rather than being perfectly straight. I've found that oak or maple branches work especially well because they're naturally dense and resist rot. For decorative accents, save branches with interesting shapes or forks—they add character without compromising structural integrity.
Soaking Time is Critical: That 1-2 hour soak in water isn't just optional—it's what prevents cracking as the branches dry. I've ruined several borders by skipping this step, and the branches always split within months. For extra insurance, especially in dry climates, soak overnight. Just don't let them sit in water longer than 12 hours or they'll start to rot.
Angle and Depth Create Stability: The 30-degree angle and 6-inch depth aren't arbitrary measurements—they're what make your border actually stay put. When placing branches, imagine a gentle curve that guides the eye through your garden. For windy areas, I recommend adding 1-2 inches of gravel at the base of each hole before inserting the branch. This hidden trick has saved my borders from toppling in storms.
Preservative Application Technique: When mixing your 1 part beeswax to 2 parts turpentine preservative, work quickly while the mixture is still warm. Use a clean, stiff brush to apply an even coat, focusing on the ends of branches where they'll be most exposed. I've found that applying two thin coats (letting each dry completely) lasts longer than one thick coat. This simple step can extend your border's life from 2-3 years to 5-10 years or more.
Pro Tips for Tree Branch Garden Edging
- Creating a natural garden border that lasts takes more than just sticking branches in the ground—it's all about the details that make it truly sturdy and beautiful.
- Branch Selection Matters: Don't just grab any branches—look for ones with a slight taper and minimal knots.
- Soaking Time is Critical: That 1-2 hour soak in water isn't just optional—it's what prevents cracking as the branches dry.
Frequently asked questions
Got questions about using tree branches for garden edging?
Here are answers to the most common ones to help you plan your rustic border with confidence!
What types of tree branches work best for garden edging?
Choose branches from hardwood trees like oak, maple, or hickory—they’re durable and resist rot. Avoid softwoods (pine, cedar) or branches with bark peeling off, as they won’t last long. Look for 3–6 inch diameter branches that are dry but not brittle for the best balance of strength and flexibility.
How long does tree branch edging last before needing replacement?
With proper treatment (like boiling in linseed oil or sealing with outdoor wood stain), branch edging can last 5–10 years or longer. Sun exposure, moisture, and pests shorten lifespan. Check annually for cracks or mold—replace damaged sections promptly to maintain your border’s charm.
Do I need to treat the branches before installing them?
Untreated branches rot quickly. Boil them in linseed oil (1 hour) or apply a waterproof sealant (like spar urethane) to deter insects and moisture. For extra durability, soak in a mix of 1 part borax to 10 parts water (24 hours) before installation. This step is non-negotiable for longevity!
Can I use tree branches for edging in vegetable gardens?
Yes, but with caution! Avoid treating branches with toxic chemicals (like arsenic-based stains). Opt for food-safe sealants (e.g., beeswax or natural linseed oil) and ensure branches are fully cured (no sap). Keep edging 3+ inches from soil to prevent rot near crops. Bonus: Branches double as trellises for climbing veggies!
Is tree branch edging more expensive than other materials?
Not necessarily! Branches are free or low-cost (forage from your yard or local parks). Compared to plastic, metal, or stone edging, they’re budget-friendly upfront. However, labor and treatment supplies (oil, sealant) add costs. For a DIY project, branches win—just budget $10–$50 for materials per 10-foot border.
What should I do if branches start rotting or attracting pests?
Act fast! Remove and replace moldy or insect-infested branches immediately. Before reinstalling, scrape off old sealant, re-treat with boiling oil or vinegar solution, and apply a fresh coat of sealant. To prevent future issues, elevate branches (use gravel or pavers beneath) and avoid planting near water sources.
Wrapping up and next steps
Transforming your garden with tree branch edging isn’t just about aesthetics—it’s a sustainable, budget-friendly way to create a border that tells a story. Whether you’re embracing rustic charm or blending nature into your landscape, these branches offer durability and a touch of organic beauty that lasts for years.
Ready to elevate your outdoor space? Start small—gather a few branches, sketch a design, and let your creativity grow! 🌿✨
Next steps:
- Test a small section first to refine your technique.
- Explore local tree sources for free or low-cost materials.
- Share your progress (or final project!) for inspiration.